
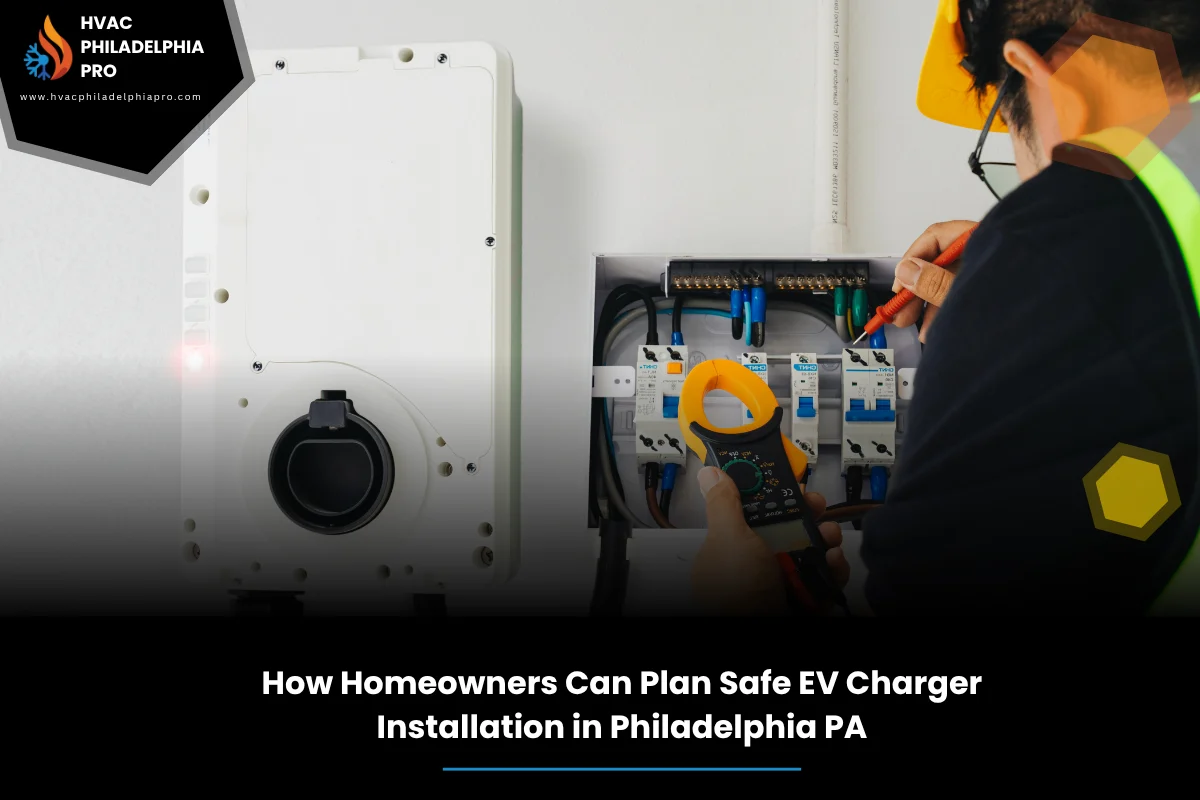
Putting an EV charger at home should feel simple and safe. With the right plan, you can avoid surprises and charge faster at night. In this guide, we walk through the key steps for home EV charger installation in Philadelphia, so you know what to check, who to call, and how to keep your system safe for years.
HVAC Philadelphia Pro helps homeowners deal with electrical work every day, but this article stays educational. If you need hands-on help, you can learn more about home EV charger installation in Philadelphia and then use the steps here to plan with confidence.
We keep the focus on safety, permits, panel capacity, and the best place to mount your charger. We also cover Level 1 vs Level 2 options, wiring basics, and simple checks you can do today. If you want the full picture, our pillar content offers a complete guide to EV charger installation in Philadelphia for homes and small facilities, which this article supports.
Table of Contents
Quick summary
Here’s the short version. Start with your car’s charging needs and your home’s electrical capacity. Plan a dedicated 240V circuit for most Level 2 units, pick a safe mounting spot near your parking area, and sort permits before work starts. For a step-by-step walk-through, see the Complete Guide to EV Charger Installation in Philadelphia PA for Homes and Small Facilities as a deeper reference.
Next, check your panel’s spare capacity and distance to the install location. Choose a weather-rated charger and cable length that fits your driveway or garage layout. Hire a licensed pro when running new wiring or upgrading a panel. After install, test charging speed, confirm GFCI protection, and set a basic maintenance routine.
Understand your home power and EV needs
Before you pick a charger, map your needs. How many miles do you drive daily? How fast do you need to recharge overnight? These answers will help you decide between Level 1 and Level 2 charging and whether you need a new circuit.
List your big appliances: oven, dryer, AC, heat pump, and any electric heaters. These draw a lot of power and may limit space on your panel. A quick panel check tells you if a new 240V circuit can fit safely.
If you plan for a second EV later, size your system now. A larger wire run today may save you time and money down the road. Keep notes, pictures of your panel, and distances from panel to parking spot.
Permits, codes, and safety in Philadelphia
Most EV chargers need a permit. The goal is safety and code compliance. Permits confirm proper wire size, breaker rating, and GFCI protection. Expect inspections that verify the work matches the plan.
According to U.S. Department of Energy (2024), Level 2 charging uses a 240V dedicated circuit and should follow manufacturer and code requirements for safe operation. U.S. DOE Alternative Fuels Data Center: Home Charging
Work with your installer to handle drawings, panel labels, and load calculations. This keeps your project smooth and helps avoid rework. If your home is older, plan for upgrades to meet today’s safety rules.
Choosing Level 1 vs Level 2 at home
Many households start with Level 1 using a standard 120V outlet. It’s slow but simple. Most owners soon switch to Level 2 EV charger installation in Philadelphia for faster overnight charging. Level 2 needs a 240V circuit and often a wall-mounted unit near your parking spot.
Think about your daily miles, commute, and weekend trips. If you need a quick top-up, Level 2 is the right fit. For low mileage drivers, Level 1 may be enough, at least for now.
| Option | Voltage | Typical install needs | Charge speed | Best for |
|---|---|---|---|---|
| Level 1 | 120V | Standard outlet, no new circuit | Slow, adds a few miles per hour | Low daily miles or backup |
| Level 2 | 240V | Dedicated 240V circuit, new breaker, permit | Fast, often a full overnight charge | Most households and commuters |
| Level 2 via 240V outlet | 240V | 240V outlet installation for EV charger on a dedicated circuit | Fast, similar to hardwired | Flexibility to unplug or move |
Panel capacity, circuits, and wiring basics
Your panel must support the new load. A load calculation checks total usage versus panel rating. If you are close to the limit, plan a panel upgrade or a load management solution. Avoid putting a Level 2 charger on a shared circuit.
Discuss wire gauge, breaker size, and run length with your installer. Longer runs may need thicker wire to handle voltage drop. Use properly rated conduit and fittings for indoor or outdoor paths.
Ask for GFCI protection and clear labeling. These steps help prevent shock hazards and make future service easier. Keep a copy of the permit and final inspection for your records.
Site planning: location, cable reach, and weather
Pick a mounting spot close to your parking position to reduce cord strain. Leave room to park forward or back-in. Check that the cable reaches the charging port without pinching or tripping hazards. A neat path equals safer daily use.
If outdoors, choose a NEMA-rated enclosure that handles rain and snow. Mount at a height that avoids puddles and splash. Consider sun, wind, and how you use the driveway.
Plan simple cable management. A holster and hook reduce wear on the connector. Keep the area clear of storage bins and tools so the charger can vent and stay cool.
4-step safe-install plan you can follow
Use this simple framework to keep your project tight and safe. For more background and expanded checklists, the pillar covers the complete guide on this topic in depth.
Plan: Define charging goals, daily miles, and whether one or two EVs need support. Decide on Level 1 or Level 2 charging. Sketch a path from panel to charger.
Check: Confirm panel capacity with a load calc. Measure run length and choose wire size, breaker rating, and GFCI. Prepare permit documents.
Install: A licensed pro mounts the unit, pulls cable, lands conductors, labels the panel, and tests. Protect outdoor runs with proper conduit and fittings.
Verify: Test charging speed, confirm cord reach, and check for heat or nuisance trips. Log settings and keep manuals, permits, and inspection sign-off.
Working with an EV charger electrician in Philadelphia
A qualified EV charger electrician in Philadelphia will review your goals, inspect your panel, and outline permit steps. They should explain breaker size, wire gauge, and GFCI in plain terms.
Ask for a clear scope: trenching or surface mount, indoor vs outdoor, outlet vs hardwire, and patching if needed. Confirm code references and product listings for the charger and parts.
Get a timeline and what to expect during shut-offs. Good planning reduces mess and keeps you charging quickly after inspection.
Common mistakes to avoid
Do not put a Level 2 charger on a shared dryer outlet without a proper transfer device and permit. Avoid long extension cords. These create heat and risk.
Do not skip a load calculation. It protects your panel and prevents nuisance breaker trips. Avoid undersized wire, loose terminations, or missing GFCI protection.
Do not mount where the cord crosses a walkway. Keep the charger away from water sources and yard tools. A tidy layout is safer and lasts longer.
After-install safety checks and upkeep
Touch the charger face and cord after a normal session. Warm is normal; hot is not. If you feel excess heat, call a pro and pause use until checked.
Test the unit’s built-in safety button monthly. Keep vents clear and wipe dust with a dry cloth. Replace cracked holsters or worn cords early.
Once a year, tighten lugs, confirm labels, and test GFCI functionality. Save any firmware updates and note changes to charging speed or behavior.
Timeline and what to expect on install day
Most installs take part of a day once permits are ready. The power may be off briefly while the circuit is added. The installer will mount the charger, run conduit, pull wire, and land it on a new breaker.
After mounting, they program charger settings and confirm Wi-Fi or load limits if supported. A quick test with your EV checks current draw and expected miles added per hour.
The final inspection verifies mounting height, labeling, breaker size, and enclosure rating. Keep all paperwork in a home binder for future reference.
How this guide supports the complete guide
This article focuses on safe planning and homeowner steps, while the complete guide to EV charger installation in Philadelphia for homes and small facilities dives deeper into product choices, permitting tips, and broader scenarios for small sites.
Use both together. Start here to plan your goals and safety checks. Then reference the broader guide for extra context, code notes, and edge cases like multi-EV setups or detached garages.
FAQs
- Do I always need a permit for a home EV charger?
In most cases, yes. A permit helps ensure correct wire size, breaker rating, GFCI, and safe installation. Check local rules and follow the process to avoid rework.
- Is Level 1 charging enough for daily use?
It can be for short commutes. But many drivers choose Level 2 to add range faster overnight and reduce charging time stress during busy weeks.
- What is a dedicated 240V circuit and why do I need it?
It is a circuit serving only the charger, sized for its load. It reduces overload risks and helps the breaker and wiring handle continuous charging safely.
- Can I mount the charger outdoors?
Yes, if the unit and enclosure are rated for weather. Use proper conduit, fittings, and mounting height. Keep cords off walk paths and protect from vehicles.
- How long does installation usually take?
Once permits are ready, many installs finish in half a day. Longer runs, trenching, or panel upgrades can add time.
- Do I need Wi-Fi features on my charger?
No, but they help track energy use and set schedules. Smart features can manage load and lower peak demand in some homes.
- Should I choose an outlet or hardwired charger?
Outlets offer flexibility. Hardwired units reduce plug wear and can look cleaner. Both can be safe if installed on a dedicated circuit and permitted.
- What maintenance does a charger need?
Keep it clean, test safety monthly, and check for heat or damage. Have connections inspected yearly, especially after heavy seasonal use.
Conclusion
Safe planning makes home EV charger installation in Philadelphia straight and stress-free. Start with your driving needs, then confirm panel capacity, permits, and a dedicated 240V circuit. Pick a weather-ready unit, a smart mounting spot, and clear cable paths. Test after install and keep simple upkeep habits.
If you want more details beyond this planning guide, the complete guide to EV charger installation in Philadelphia for homes and small facilities offers deeper context you can review alongside these steps. Contact HVAC Philadelphia Pro for expert assistance if you want a professional set of eyes on your plan or need help with permits, wiring, or final testing.
continue reading
Related Posts
Learn how an EV charger diagnostic service finds the real reason your charger fails. Follow clear steps, tools, and safety tips to fix power, signal, or app issues at home.
See how a regular EV charger tune up in Philadelphia prevents heat, faults, and downtime. Learn safety checks, Level 2 care, a 6-step framework, and when DIY is enough.
Learn how to install new air conditioner in Philadelphia step by step. From sizing and ducts to safe startup and tuning, this plain-English guide keeps your project on track.